
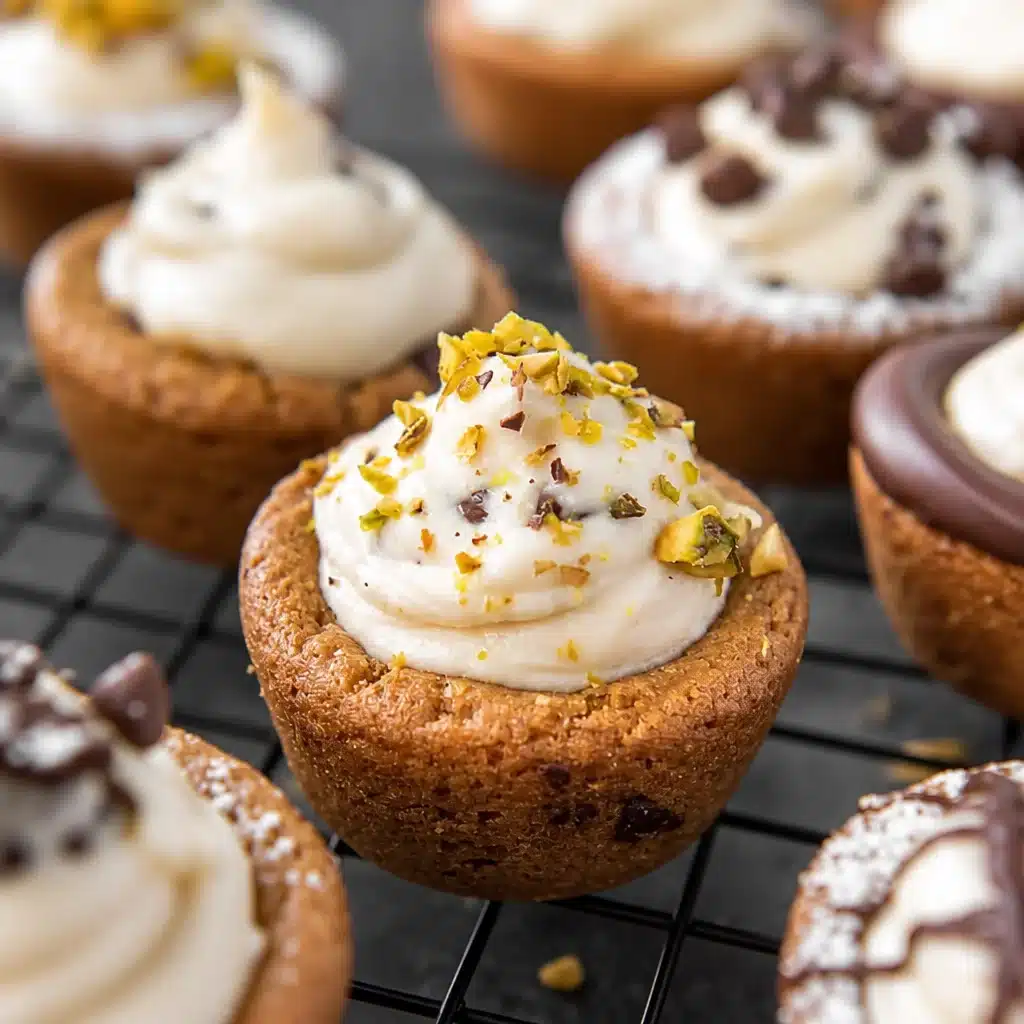
Old-Fashioned Creamy Chocolate Cannoli Ricotta Bars are my go to move when I want that classic cannoli vibe but do not feel like babysitting a bunch of delicate shells. You know those days when you want something sweet and cozy, but you also want it to be easy enough to pull off on a weeknight? That is exactly where these bars live. They taste like a bakery treat, but you can slice them up like brownies and share them without stress. Plus the creamy ricotta layer feels special, like you actually tried hard, even if you did not. 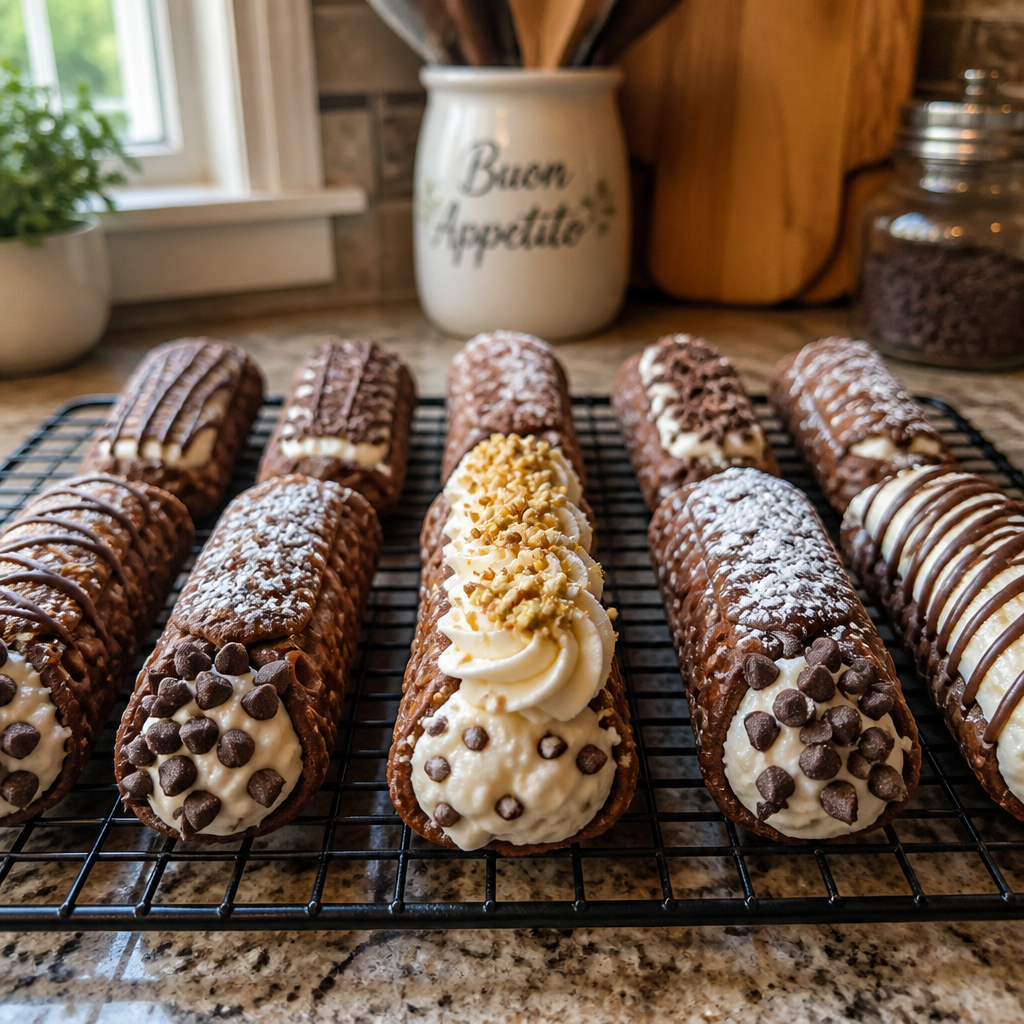
What you need to make decadent chocolate cannoli
I make these bars when I want chocolate, creaminess, and a little old school Italian bakery energy in one bite. The best part is you are basically building layers: a chocolate crust base, a ricotta filling that tastes like cannoli, and a simple chocolate finish. If you love ricotta desserts, you might also like these cozy creamy old fashioned ricotta cookies for a softer, snacky option.
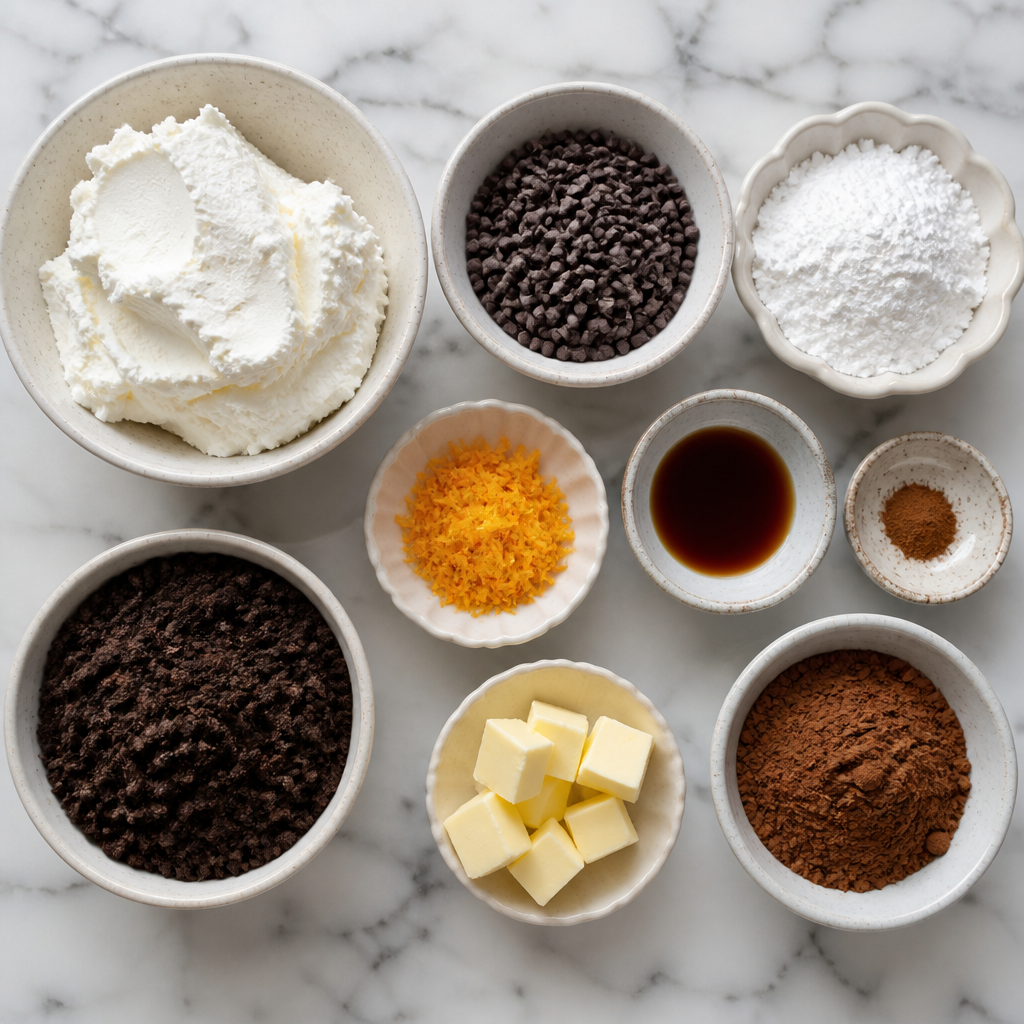
My go to ingredients
- Ricotta cheese (whole milk if you can, it tastes richer)
- Mini chocolate chips (they spread out better than big chunks)
- Powdered sugar (for that classic cannoli sweetness)
- Vanilla extract (simple, but it matters)
- A pinch of cinnamon (optional but very cannoli-like)
- Orange zest (optional, brightens everything)
- Chocolate cookie crumbs or crushed wafers (for the base)
- Butter (to hold the crust together)
- Cocoa powder or melted chocolate (for extra chocolate punch)
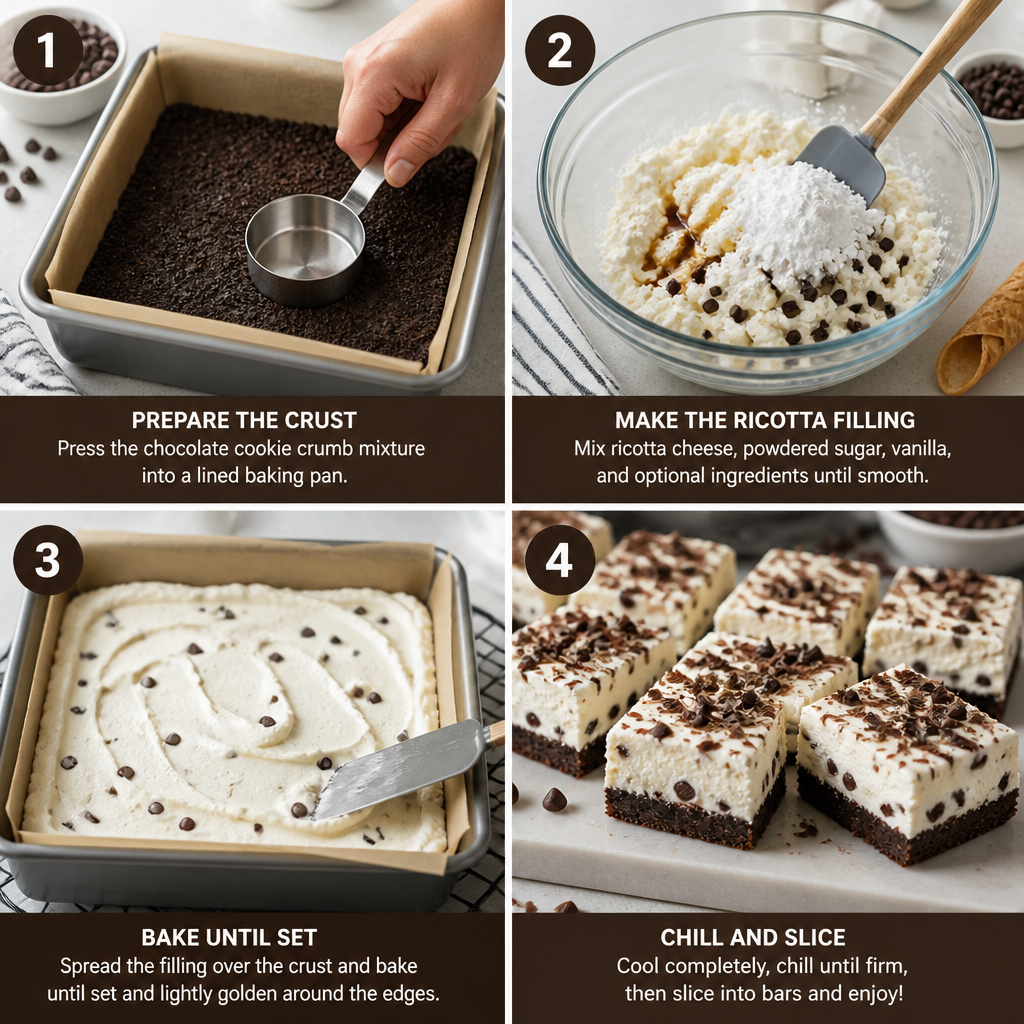
Here is my basic game plan. Press the crumb crust into a lined baking pan. Mix ricotta with powdered sugar, vanilla, and your add ins like chips, cinnamon, or zest. Spread it on top and bake until set. Chill completely before slicing, because that is when they turn into true Old-Fashioned Creamy Chocolate Cannoli Ricotta Bars instead of a warm scoop situation.
One small but important note: ricotta can be watery. If yours looks wet, just spoon it into a fine strainer for 20 to 30 minutes. You do not have to squeeze it bone dry, but getting rid of extra liquid helps the bars slice cleanly and keeps the texture thick and creamy.
Frying tips
So here is the funny part. These are bars, so we are not actually frying shells. But I get asked about frying cannoli shells all the time, and the tips still matter if you are chasing that old fashioned flavor at home. Also, the same common mistakes show up when people try to make crispy crusts or crunchy toppings for these bars.
If you ever fry cannoli shells, remember this
Keep it simple and safe:
Oil temperature is everything. Too cool and shells turn greasy. Too hot and they burn before they crisp. If you have a thermometer, you will use it forever, not just for cannoli.
Do not overcrowd the pan. Frying is not a race. Crowding drops the oil temp and messes up texture.
Drain on a rack if you can. Paper towels work, but a rack keeps things crisp.
For these Old-Fashioned Creamy Chocolate Cannoli Ricotta Bars, I borrow that same mindset: do not rush the crust. Press it firmly, bake it just enough to set, and let it cool before adding the ricotta layer if your recipe includes a pre bake. That little bit of patience gives you a base that tastes like something you worked on, not something that fell apart.
What distinguishes cannoli from other desserts
Cannoli are different because the whole point is contrast. Crunchy shell, creamy filling, and little pops of flavor like chocolate, citrus, or pistachio. A lot of desserts are just one texture all the way through. Cannoli are like a snack and a dessert at the same time.
When I turn that idea into Old-Fashioned Creamy Chocolate Cannoli Ricotta Bars, I focus on three things:
1) A sturdy chocolate base so you get that bite and structure.
2) A ricotta filling that is thick and not watery because that is the heart of cannoli flavor.
3) Little bursts of chocolate from mini chips so every bite feels fun.
I brought these to a family dinner and my aunt who is picky about cannoli said they tasted like the filling from her favorite bakery. She even asked for two extra pieces to take home, which never happens.
If you are into that orange and chocolate combo that some cannoli shops do, you would probably love these ricotta bar cousins too: chocolate orange ricotta blondie bars. Same cozy feeling, slightly different vibe.
Variations of cannoli recipes
I am all for sticking to the classic, but I also think dessert should match your mood. Once you have the base idea down, you can take Old-Fashioned Creamy Chocolate Cannoli Ricotta Bars in a bunch of directions without making your life harder.
Easy variations I actually use
Chocolate peanut butter: swirl a few spoonfuls of peanut butter into the ricotta layer. If that sounds like your thing, check out these chocolate peanut butter ricotta bars for another creamy, chocolatey option.
Chocolate orange: add orange zest to the ricotta and a tiny splash of orange extract if you have it. There is also a slightly different version of the orange ricotta bar idea here: chocolate orange ricotta blondie bars 2.
Espresso: mix 1 to 2 teaspoons of instant espresso powder into the chocolate layer or dust a little on top. It makes the chocolate taste deeper, not like coffee cake.
Pistachio: sprinkle chopped pistachios on top after baking and chilling, right before serving, so they stay crunchy.
Extra old fashioned: add a tiny pinch of cinnamon and a little orange zest, then finish with powdered sugar right before serving. That combo screams bakery case.
One more thing. If you want the bars to look fancy without extra effort, drizzle melted chocolate on top after chilling. It sets fast and makes them feel like a special occasion dessert.
Tips for perfecting your cannoli texture
This is the section that saves you from the two biggest problems: watery filling and messy slices. I have made both mistakes, and yes I still ate them, but I like them better when they slice clean and feel thick.
Tip 1: Drain the ricotta if needed. Even 20 minutes makes a difference.
Tip 2: Chill longer than you think. I aim for at least 3 hours, and overnight is even better. Old-Fashioned Creamy Chocolate Cannoli Ricotta Bars get that true creamy set after time in the fridge.
Tip 3: Line your pan. Parchment paper makes lifting and slicing so much easier. No digging pieces out with a spoon.
Tip 4: Use a hot knife for clean cuts. Run your knife under hot water, wipe it, slice, repeat. It sounds fussy but it is quick.
Tip 5: Do not overbake. You want the center set, not dry. The filling will firm up more as it cools.
If your crust feels too crumbly, you probably need a touch more melted butter or a tighter press into the pan. If the filling tastes a little flat, add a pinch of salt and a little more vanilla. Those tiny tweaks make the flavor pop without making it taste complicated.
Common Questions
Q: Can I use part skim ricotta?
A: Yes, but whole milk ricotta tastes richer and gives a creamier bite. If you use part skim, definitely drain it if it looks wet.
Q: Do these bars need to be refrigerated?
A: Yes. Because of the ricotta, keep them in the fridge and pull them out about 10 minutes before serving.
Q: Can I freeze Old-Fashioned Creamy Chocolate Cannoli Ricotta Bars?
A: You can. Slice them, wrap them well, and freeze. Thaw overnight in the fridge. The texture is slightly softer but still really good.
Q: How do I keep the crust from getting soggy?
A: Make sure the crust is firmly packed, and chill the bars long enough to set. Draining watery ricotta also helps a lot.
Q: What chocolate works best?
A: Mini semi sweet chips are my favorite. If you like a deeper flavor, use dark chocolate chips or add a little cocoa powder to the crust.
A sweet little push to try these this week
If you have been craving a bakery style treat but you want something simple, Old-Fashioned Creamy Chocolate Cannoli Ricotta Bars are the answer. They give you that classic cannoli cream feeling with way less work, and they are perfect for sharing. If you want another fun cannoli inspired bake, these Chocolate Chip Cannoli Cookies – The Crumby Kitchen are also a great idea for parties. Put on some music, let the bars chill, and enjoy that first creamy chocolatey slice like you totally planned ahead.
Print
Old-Fashioned Creamy Chocolate Cannoli Ricotta Bars
- Total Time: 45 minutes
- Yield: 16 servings
- Diet: Vegetarian
Description
A simpler take on classic cannoli, these creamy chocolate ricotta bars combine a chocolate crust with a rich ricotta filling for an easy, shareable dessert.
Ingredients
- 1 cup chocolate cookie crumbs or crushed wafers
- 1/2 cup butter, melted
- 1 cup ricotta cheese (whole milk)
- 1/2 cup powdered sugar
- 1 tsp vanilla extract
- 1/2 cup mini chocolate chips
- a pinch of cinnamon (optional)
- 1 tsp orange zest (optional)
- 2 tbsp cocoa powder or melted chocolate (for extra chocolate punch)
Instructions
- Preheat the oven to 350°F (175°C).
- Mix the melted butter with the cookie crumbs until combined.
- Press the mixture firmly into the bottom of a lined baking pan to form the crust.
- Combine the ricotta, powdered sugar, vanilla, and any optional add-ins like chocolate chips, cinnamon, or zest.
- Spread the ricotta mixture evenly over the crust.
- Bake for about 30 minutes, or until set.
- Chill completely before slicing into bars.
Notes
For best results, drain the ricotta if it appears watery to ensure a clean slice.
- Prep Time: 15 minutes
- Cook Time: 30 minutes
- Category: Dessert
- Method: Baking
- Cuisine: Italian