
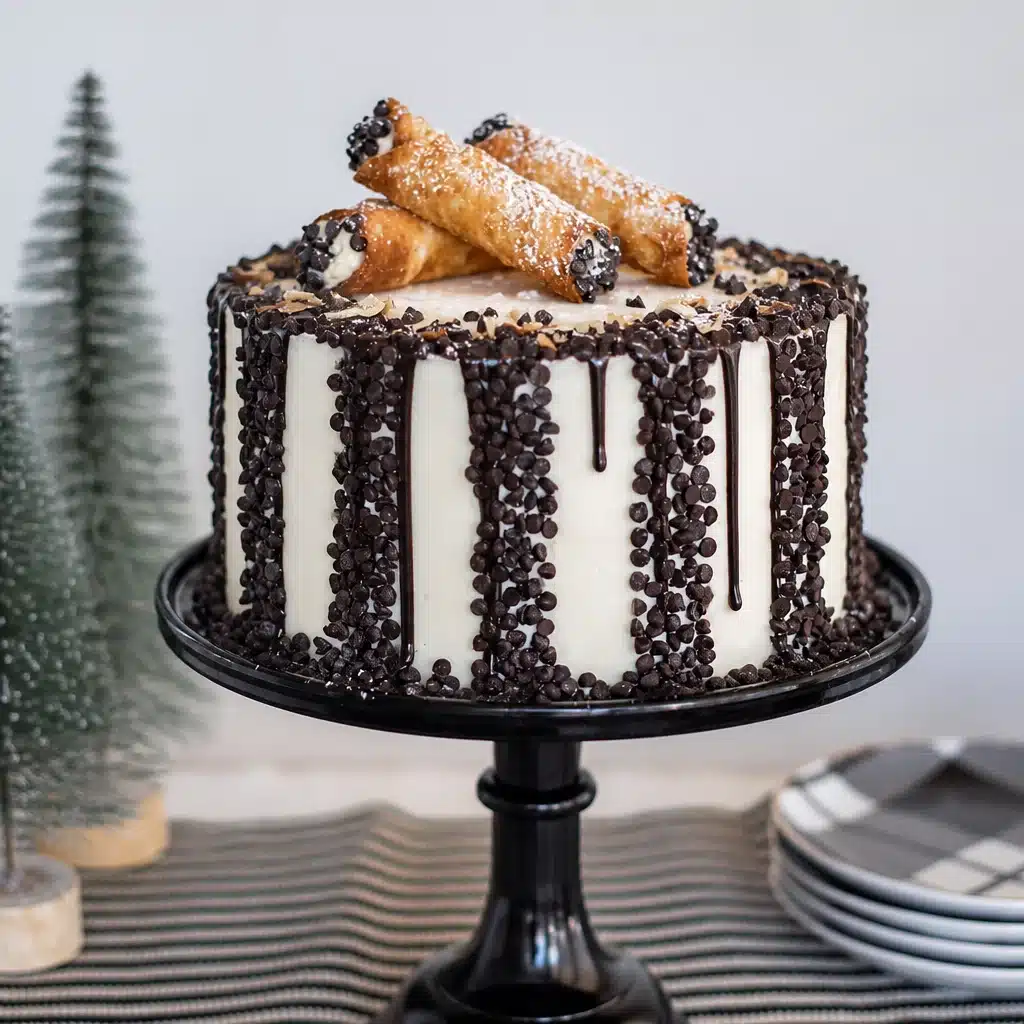
Ricotta Chocolate Chip Cannoli Cake has saved me more times than I can count when I needed a dessert that feels special but still doable on a regular day. You know that moment when you want something bakery pretty, but you also want it to taste like comfort food? This is that cake. It’s creamy, a little nostalgic, and packed with those tiny chocolate chips that make every bite feel like a treat. If you love cannoli but do not feel like frying anything, this is the happy middle. Let’s get into it. 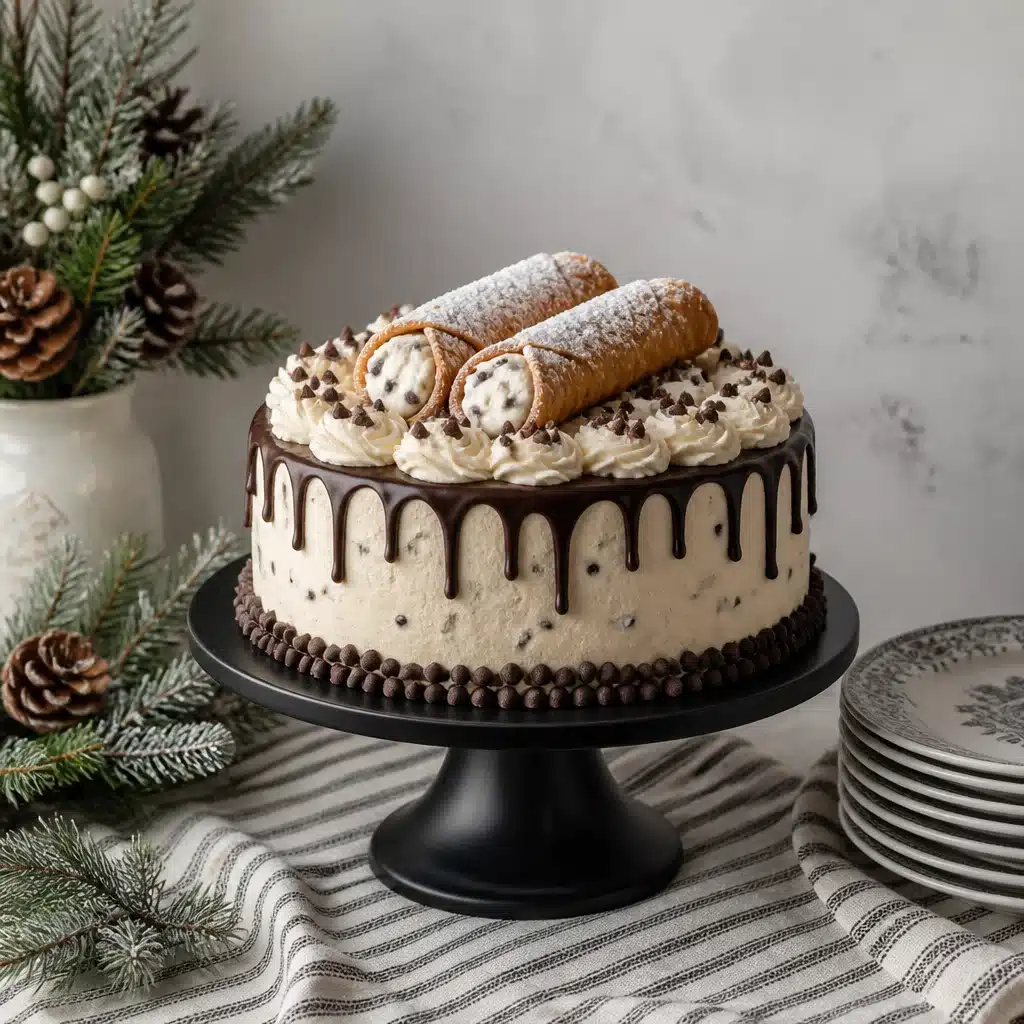
How to Make the Cake Layers
I like to think of the cake layers as the sturdy, tender base that lets the ricotta filling shine. You do not need fancy equipment here, but you do need a little patience so the layers bake evenly and cool completely before you stack them.
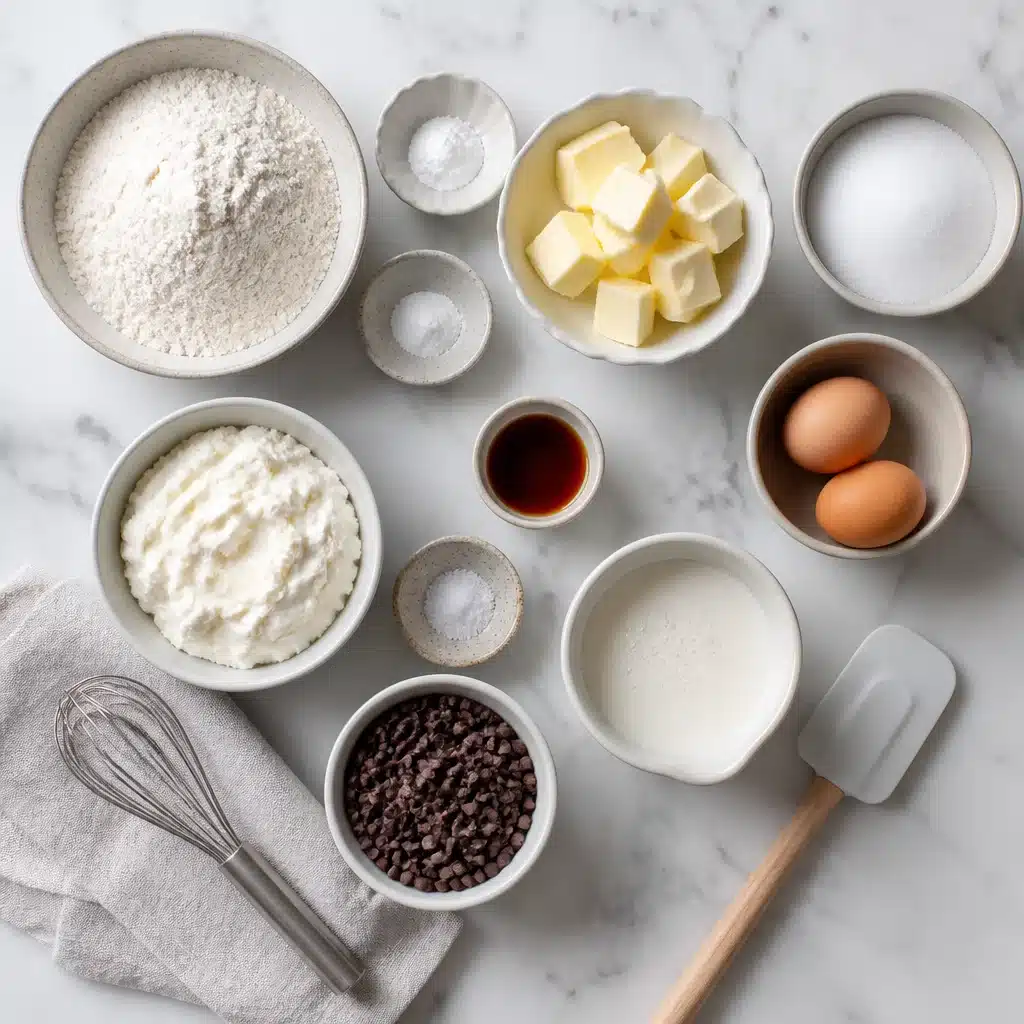
Ingredients and what you will need
Here is what I usually grab. If you bake often, you probably already have most of it.
- All purpose flour
- Baking powder and a pinch of baking soda
- Salt
- Unsalted butter, softened
- Sugar
- Eggs
- Vanilla extract
- Milk or buttermilk
- A little cinnamon (optional, but it gives that cannoli vibe)
I bake this in two or three round pans. Two pans are easier if you do not want to level a bunch of layers. Three pans looks extra pretty if you want a taller Ricotta Chocolate Chip Cannoli Cake for a party.
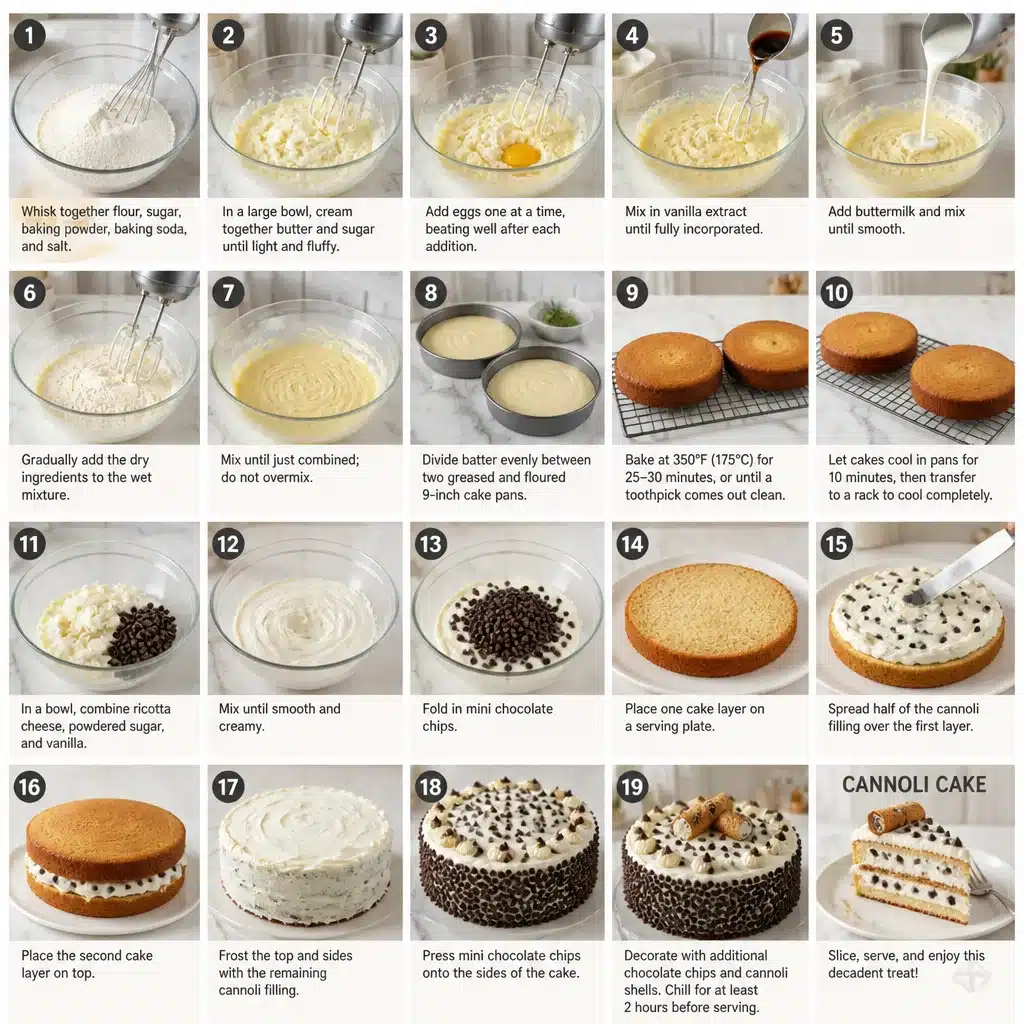
My simple step by step
1) Preheat your oven and prep your pans with parchment on the bottom. I also grease the sides because I hate cake anxiety.
2) Whisk the dry ingredients in a bowl.
3) In a separate bowl, cream butter and sugar until it looks lighter and a bit fluffy.
4) Add eggs one at a time, then vanilla.
5) Add dry ingredients and milk in turns, mixing just until you do not see flour streaks.
6) Bake until the center springs back when you gently tap it.
7) Cool in the pans for about 10 minutes, then turn out onto a rack to cool all the way.
Quick tip from my own mistakes: if the layers are even a little warm, the filling will slide around and you will be doing damage control with a spatula. Let them cool completely. If you want to dive deeper into ricotta and chocolate chip baking, I also really like this related recipe: chocolate chip ricotta cake. It’s a great “snack cake” cousin to this bigger celebration style dessert.
How to Make Cannoli Filling
This is the part that makes people’s eyes light up. The filling is creamy, lightly sweet, and tastes like the inside of a cannoli without the fuss.
The number one thing I do is drain my ricotta. Even if it looks thick, it can still carry extra moisture, and that can make your filling loose. I scoop ricotta into a fine mesh strainer over a bowl and let it sit in the fridge for at least a couple of hours, or overnight if I planned ahead for once.
For the filling, I mix:
- Whole milk ricotta, drained
- Powdered sugar, sifted if it is clumpy
- Vanilla extract
- A pinch of cinnamon
- Mini chocolate chips
- Optional: a little orange zest if you like that classic cannoli flavor
I stir it gently so it stays thick and creamy. You do not need to whip it like crazy. If you want it even more stable for stacking, you can fold in a bit of mascarpone, or even a few spoonfuls of thick whipped cream, but honestly drained ricotta does most of the heavy lifting.
This is also a good moment to taste and adjust. Some people like it sweeter. I like mine a little more mellow because the buttercream and chocolate chips bring sweetness later.
And yes, this Ricotta Chocolate Chip Cannoli Cake filling is the kind of thing you will “accidentally” eat straight from the bowl. Consider yourself warned.
I made this for my sister’s birthday and everyone kept asking if it came from an Italian bakery. The filling was the star and the mini chips made it feel so fun. I am making it again next month.
How to Make the Buttercream
I know buttercream can feel intimidating, but this one is pretty forgiving. The goal is a smooth, lightly sweet layer that helps seal in the filling and gives you that pretty finished look.
I make a basic vanilla buttercream and keep it simple:
- Beat softened butter until smooth.
- Add powdered sugar slowly so you do not create a sugar cloud in your kitchen.
- Add vanilla and a pinch of salt.
- Add a splash of milk or cream until it is spreadable.
If you want to lean into the cannoli vibe, you can add a tiny pinch of cinnamon here too. Not enough to scream cinnamon, just enough to make someone pause and say, what is that amazing flavor?
My real life advice: do a thin crumb coat first. It is just a light layer of buttercream that traps crumbs so your final coat looks cleaner. Chill the cake for 15 to 20 minutes, then do your final coat.
Also, if you love ricotta plus chocolate chips in other forms, you should try these sometime for a cozy weekend breakfast: ricotta chocolate chip pancakes. Same comfort energy, different vibe.
How to Make Mini Chocolate Chip Stripes
This part looks fancy, but it is basically a fun little craft project you can eat. The mini chocolate chip stripes give that “cannoli dessert bar” feel and make the cake look decorated without needing piping skills.
Here is the easiest way I do it:
- Melt a small amount of chocolate (dark or semi sweet both work)
- Spread it thin on parchment paper into a rectangle
- Sprinkle mini chocolate chips on top and lightly press them in
- Chill until firm but not rock hard
- Slice into thin strips with a sharp knife
When you slice, wipe the knife between cuts if the chocolate starts dragging. Then you just press the stripes gently onto the frosted cake. You can do vertical stripes, diagonal stripes, or a loose wraparound pattern. If a stripe breaks, just pretend it was your plan and patch it creatively.
This is also where you can add a little powdered sugar dusting right before serving. It gives that classic cannoli look and makes the whole Ricotta Chocolate Chip Cannoli Cake feel extra special.
More Desserts to Try
If you are anything like me, once you buy a tub of ricotta you start looking for ways to use the rest. I love having a few go to recipes so nothing goes to waste and dessert feels easy.
One of my favorites for a chilled treat is stracciatella ricotta cheesecake bars chocolate chip swirl. They are creamy and you can slice them up for quick little snacks. If you are making this cake for a gathering, those bars are also great for the next weekend when you want something low effort but still exciting.
And if you end up obsessed with the flavor combo, just know you are not alone. The mix of ricotta and mini chips is one of those things that never gets old.
Common Questions
Can I make Ricotta Chocolate Chip Cannoli Cake ahead of time?
Yes. I actually think it tastes better after a night in the fridge. Assemble it, cover it well, and chill. Add any final toppings right before serving.
How do I keep the filling from getting runny?
Drain the ricotta and do not skip it. Also, do not overmix. If your kitchen is warm, chill the filling for 20 to 30 minutes before assembling.
Can I use regular chocolate chips instead of mini?
You can, but mini chips are better in the filling because they spread out more evenly. Regular chips can make slicing messy.
Do I have to use buttercream?
No. You can frost with stabilized whipped cream if you want it lighter, but buttercream holds up better if the cake sits out for a while.
How should I store leftovers?
Keep leftovers in the fridge in an airtight container. It stays good for about 3 to 4 days, and the slices are amazing cold.
A sweet final note before you bake
If you have been craving a dessert that feels like a celebration without being a huge headache, this Ricotta Chocolate Chip Cannoli Cake is it. Focus on draining the ricotta, cooling your layers fully, and keeping the filling thick, and you will be in great shape. The chocolate chip stripes are optional, but they really do make it look like you bought it from a fancy place. And if you want to compare ideas, I enjoyed reading Cannoli Cake with the Most Delicious Chocolate Chip Ricotta Filling for more cannoli cake inspiration. Now go bake it, slice it big, and do not be surprised if someone asks you to make it again next week.
Print
Ricotta Chocolate Chip Cannoli Cake
- Total Time: 1 hour 15 minutes
- Yield: 8 servings
- Diet: Vegetarian
Description
A creamy and nostalgic cake inspired by cannoli, filled with ricotta and mini chocolate chips, perfect for special occasions without the fuss of frying.
Ingredients
- 2 cups all-purpose flour
- 1 and ½ teaspoons baking powder
- 1/4 teaspoon baking soda
- 1/2 teaspoon salt
- 1/2 cup unsalted butter, softened
- 1 cup sugar
- 3 large eggs
- 1 teaspoon vanilla extract
- 1 cup milk or buttermilk
- 1 teaspoon cinnamon (optional)
- 2 cups whole milk ricotta, drained
- 1 cup powdered sugar, sifted
- 1 teaspoon vanilla extract (for filling)
- 1/4 teaspoon cinnamon (for filling)
- 1/2 cup mini chocolate chips
- Optional: Orange zest
- For buttercream:
- 1 cup softened butter
- 3 to 4 cups powdered sugar
- 1 teaspoon vanilla extract
- Pinch of salt
- Splash of milk or cream
- Mini chocolate chips for decoration
Instructions
- Preheat your oven to 350°F (175°C) and prep your pans with parchment on the bottom; grease the sides.
- Whisk the dry ingredients (flour, baking powder, baking soda, and salt) in a bowl.
- Cream the butter and sugar in a separate bowl until light and fluffy.
- Add the eggs one at a time, then the vanilla extract.
- Mix in the dry ingredients and milk alternatively, just until combined.
- Bake for about 25-30 minutes until the center springs back when gently tapped.
- Cool in the pans for 10 minutes before turning out onto a rack to cool completely.
- Drain the ricotta in a fine mesh strainer in the fridge for at least 2 hours or overnight.
- Mix the drained ricotta with powdered sugar, vanilla, cinnamon, and mini chocolate chips to make the filling.
- Beat the softened butter for buttercream until smooth, gradually adding powdered sugar, vanilla, and milk until spreadable.
- Melt chocolate, spread on parchment, sprinkle with mini chocolate chips, let cool, then slice into strips.
- Assemble the cake by layering the cake with ricotta filling and frosting the outside with buttercream; decorate with chocolate stripes and a dusting of powdered sugar as desired.
Notes
To prevent the filling from becoming runny, ensure the ricotta is drained and do not overmix. Chill the assembled cake for better flavor.
- Prep Time: 45 minutes
- Cook Time: 30 minutes
- Category: Dessert
- Method: Baking
- Cuisine: Italian