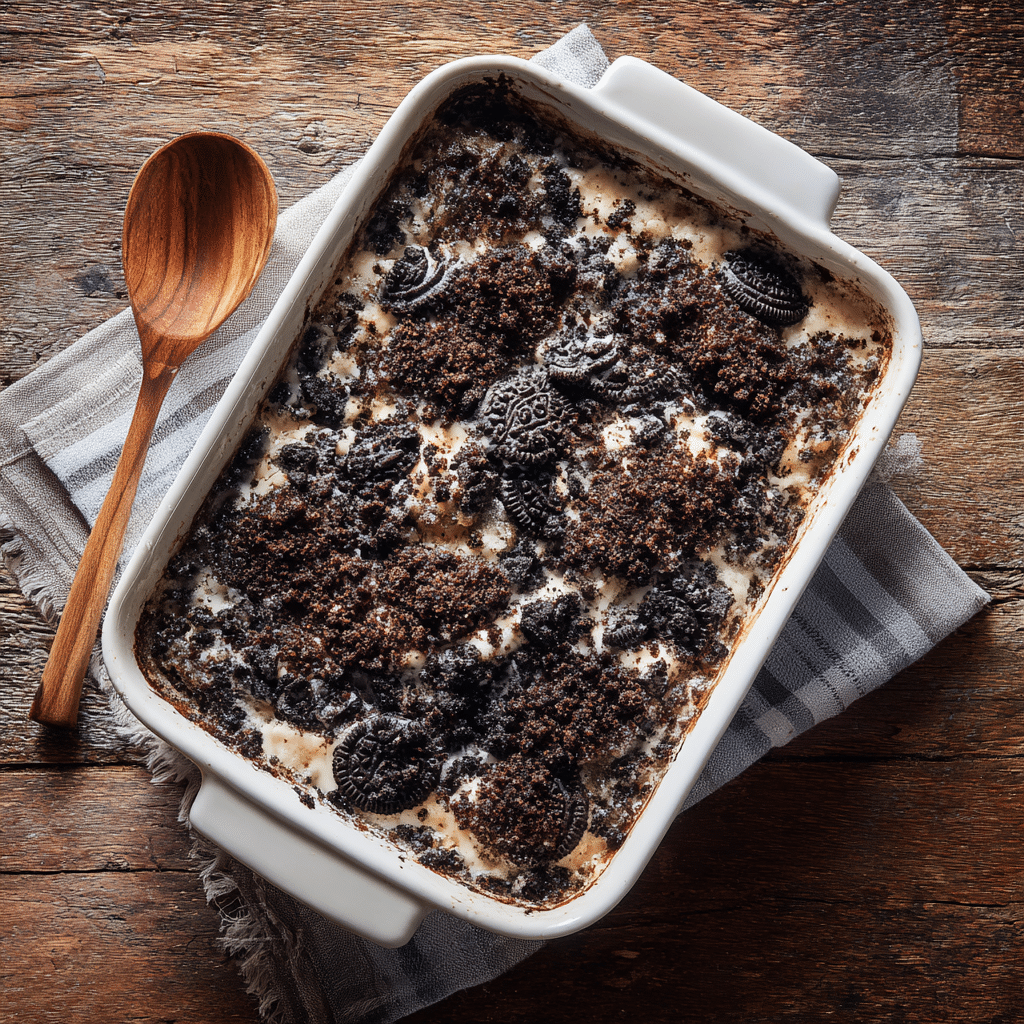
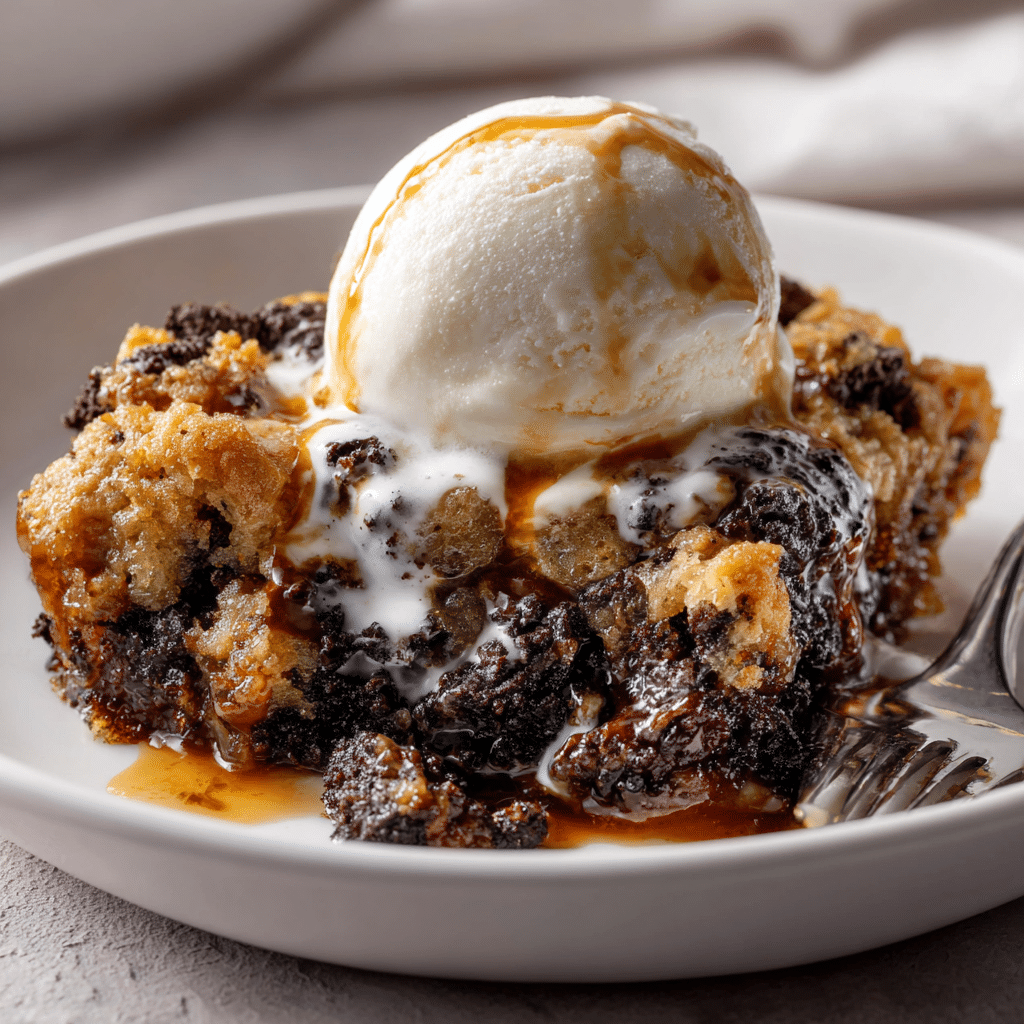
If you’re craving a dessert that’s rich, chocolatey, and downright easy, this Oreo Dump Cake is your answer. With just five ingredients and no mixing bowls, it’s a vintage-style treat you’ll want to make again and again. Whether you’re serving it at a potluck, holiday gathering, or just because it’s Tuesday, this recipe delivers fudgy, gooey layers of crushed Oreos, condensed milk, and chocolate cake all with barely any prep. In this guide, we’ll walk through exactly how to make Oreo dump cake, how to avoid common mistakes, and all the delicious ways you can serve or remix it.
Table of Contents
Table of Contents
Oreo Dump Cake: Insanely Easy, Fudgy Recipe You’ll Love Forever
- Total Time: 55 minutes
- Yield: 8
- Diet: Vegetarian
Description
This Oreo Dump Cake is the ultimate retro dessert—gooey, chocolatey, and insanely easy to make. With just five ingredients and no mixing bowls, it’s perfect for weeknights or parties.
Ingredients
▢24 Oreo cookies, divided use (6 cookies are used for topping)
▢14 ounce can sweetened condensed milk
▢8 ounce tub whipped topping (Cool Whip), thawed
▢15.25 ounce box chocolate fudge cake mix
▢½ cup salted butter, cold and thinly sliced
Instructions
1. Preheat the oven to 350°F and grease a 9×13-inch baking dish with non-stick spray.
2. Arrange the Oreos in a single layer in the bottom of the dish (use 18–22).
3. Pour the sweetened condensed milk over the Oreos.
4. Spread the thawed Cool Whip gently on top.
5. Sprinkle the dry cake mix evenly over the whipped topping.
6. Top with cold, thinly sliced butter pieces spread evenly over the surface.
7. Chop the remaining 6 Oreos and sprinkle them on top.
8. Bake for 35–40 minutes, until the top is slightly crisp and edges are bubbling.
9. Scoop and serve warm for best results.
Notes
This dessert is best enjoyed warm. Leftovers should be refrigerated and reheated in the microwave for 20–30 seconds per portion. Avoid stirring the layers before baking for the best texture.
- Prep Time: 10 minutes
- Cook Time: 45 minutes
- Category: Retro Frozen & No-Bake Desserts
- Method: Baking
- Cuisine: American
Why We Love Oreo Dump Cake
The Nostalgia of No-Bake Classics
Some desserts just feel like home. The first time I made this Oreo Dump Cake, it was one of those “use-what-you-have” nights. I had Oreos, Cool Whip, and cake mix and not much else. It was chilly out, and I wanted something cozy without pulling out every bowl in my kitchen. So I tried layering the ingredients in a greased dish and popped it in the oven. What came out was pure magic gooey, chocolatey, warm, and just the right mix of soft and crispy.
This kind of easy comfort food reminds me of flipping through my mom’s church cookbooks pages filled with no-bake pies, refrigerator cakes, and icebox desserts that worked for weeknights and Sunday potlucks alike. The Oreo Dump Cake joins those retro favorites like our Watergate Cake and Homemade Twinkies, offering sweet nostalgia with a chocolate twist.
And really, how many recipes can you make with just five ingredients and one baking dish? This one’s for those nights when you need a dessert that feels like a hug but don’t feel like doing dishes afterward.
What Makes Dump Cakes Unique
Dump cakes are a Southern-inspired shortcut that’s all about layering ingredients without mixing. Unlike traditional cakes, there’s no batter to prepare just dump and bake. The dry cake mix goes on top of a wet layer (in this case, condensed milk and whipped topping), then thin slices of butter are placed over the top to help create a crust as it bakes.
The Oreo version is especially irresistible. As it bakes, the Oreos soften and become almost brownie-like, while the chocolate cake mix forms a rich, crispy topping. Every scoop gives you a bit of warm fudge center with crunchy edges like the best parts of a brownie and a cobbler had a baby.
If you’re a fan of simple vintage desserts like Homemade Cosmic Brownies or Churro Cheesecake Bars, you’ll fall in love with this one-pan wonder.
How to Make Oreo Dump Cake
Essential Ingredients and Substitutions
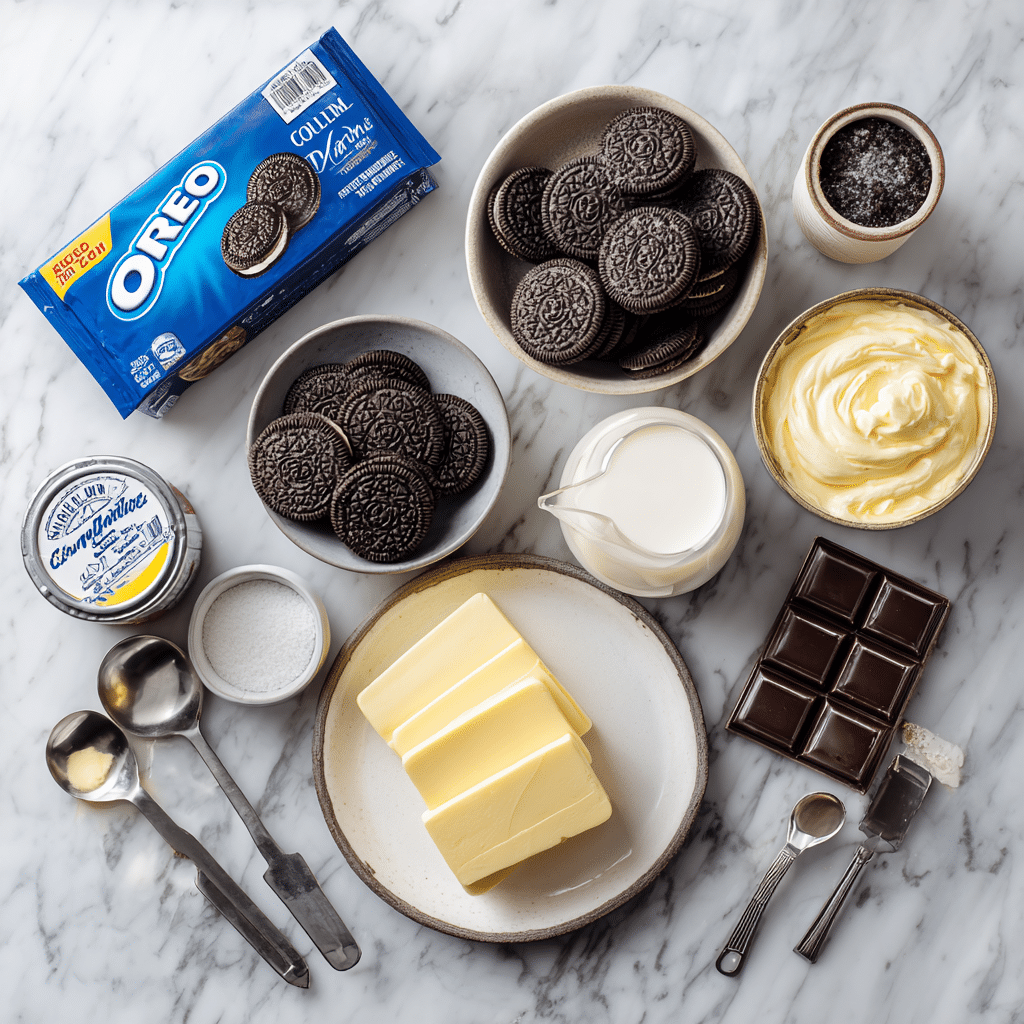
This Oreo Dump Cake couldn’t be easier to make and it all starts with five simple ingredients. You likely have most of them in your pantry or fridge right now. Here’s what you’ll need and a few ideas if you want to customize it:
- Oreo Cookies: You’ll use about 24 total 18 or so for the bottom layer and 6 chopped for topping. You can use regular, double-stuf, or even flavored Oreos (like mint or peanut butter) for a twist.
- Sweetened Condensed Milk: This creates the rich, gooey texture we all love. It sinks down into the cookies and turns them into a soft, chocolatey base.
- Whipped Topping (Cool Whip): Spreadable, sweet, and fluffy. It melts during baking, helping bind everything together. You can use homemade whipped cream, but it should be stabilized or very firm. For an elevated twist, try pairing it with our Homemade Oreos to double down on that chocolate sandwich cookie flavor.
- Chocolate Fudge Cake Mix: This goes on dry don’t mix it with anything. It forms the topping layer as it bakes. You can try devil’s food or triple chocolate cake mix too.
- Salted Butter: Cold and sliced thin, the butter melts over the cake mix, creating a crunchy, buttery crust. Don’t skip this! You want full coverage so there are no dry patches.
For kitchen improvisers: if you’re out of Cool Whip, try vanilla yogurt or a thick pudding layer. If you’re dairy-free, swap in coconut cream and a vegan cake mix.
Step-by-Step: Foolproof Oreo Dump Cake Method
This is truly a dump-and-bake recipe, but the order of layering matters. Here’s the step-by-step:
- Preheat your oven to 350°F and grease a 9×13-inch baking dish with non-stick spray. This helps the cake release cleanly when you scoop it.
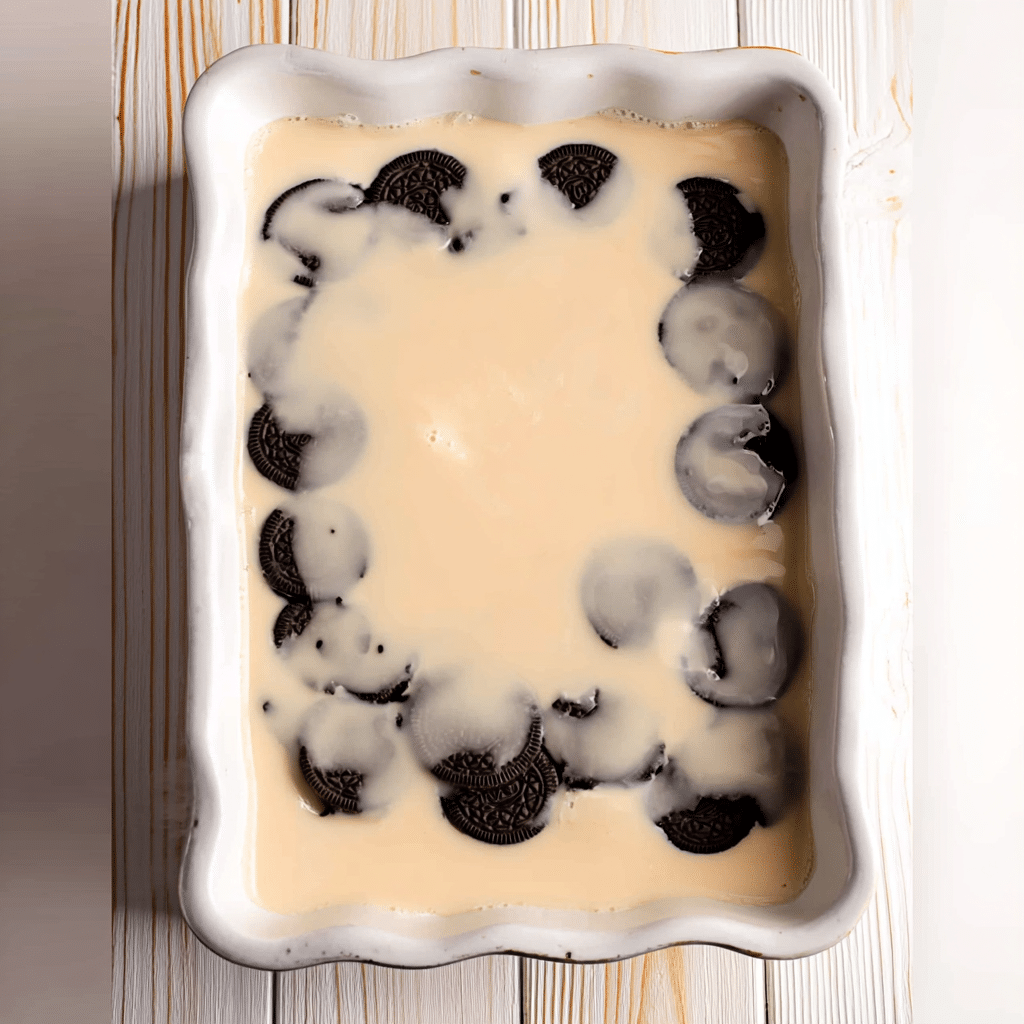
- Line the bottom with Oreos, spacing them evenly in a single layer. Depending on the pan size, you’ll use around 18–22.
- Pour the sweetened condensed milk over the Oreos. It doesn’t have to cover every inch just drizzle it evenly.
- Spread the Cool Whip gently over the top. Don’t mix just smooth it out with a spatula or spoon.
- Sprinkle the dry cake mix over the Cool Whip. Try to spread it evenly without stirring.
- Top with sliced butter, placing pieces all across the surface. The more coverage, the better your crust will form.
- Chop the remaining Oreos and sprinkle on top.
Bake uncovered for 35–40 minutes, until the edges bubble and the top is golden and slightly firm. You can scoop and serve right away this dessert is best enjoyed warm. As it cools, it firms up and becomes harder to scoop, so don’t wait too long!
For a full dessert bar lineup, pair this with a slice of Black Forest Cake or a square of Homemade Twinkies. It’s a retro table everyone will love.
Common Mistakes and Expert Tips
The #1 Mistake: Stirring the Layers
If you take one tip from this whole recipe, let it be this: don’t stir. Dump cakes rely on distinct layers doing their job in the oven. Mixing everything together disrupts the baking process and will leave you with a flat, oddly textured mess.
Here’s why it matters:
- The Oreos on the bottom soften from the condensed milk, turning into a warm, fudgy base.
- The Cool Whip melts into the cookies and milk, creating a creamy layer that binds everything together.
- The cake mix absorbs some of the moisture from below, but stays light and airy where it’s exposed to butter on top.
- The sliced butter melts down, creating a crispy, golden topping that’s slightly crunchy in spots and soft in others.
If you mix these layers, the whole texture falls apart. So when layering, treat it like a lasagna: assemble and walk away. Let the oven work its magic.
Another common issue? Not spreading the butter evenly. Dry patches of cake mix won’t bake correctly. Make sure your butter slices cover most of the surface or melt it and drizzle for more even coverage.
Storing and Reheating
This cake is best served warm, but if you have leftovers, here’s how to make the most of them:
- Refrigeration: Yes, Oreo dump cake should be refrigerated once cooled, especially because it contains dairy (Cool Whip and condensed milk). Cover the pan tightly with foil or plastic wrap and store for up to 4 days.
- Reheating: Scoop individual portions into a microwave-safe bowl and warm for 20–30 seconds. It won’t be as crisp as the first day, but the gooey center returns beautifully.
- Freezing: Technically, you can freeze it, but the texture suffers. The Oreos become soggy, and the whipped topping may separate. If you plan to freeze, do so before baking, then bake fresh when needed.
Tip: Add a scoop of vanilla ice cream or a dollop of whipped cream on top when reheating to bring back that just-baked warmth.
Planning a dessert tray? Oreo dump cake stores nicely next to chilled desserts like Churro Cheesecake Bars or Homemade Cosmic Brownies, especially when cut into squares once chilled.
Variations & Serving Ideas
2-Ingredient Oreo Cake vs. Dump Cake
You may have seen the viral 2-ingredient Oreo cake floating around social media. It’s a clever and fun dessert just crush Oreos and mix with milk, then microwave or bake. But while it’s quick, it’s not quite the same as a full Oreo Dump Cake experience.
Here’s a quick comparison:
| Feature | 2-Ingredient Oreo Cake | Oreo Dump Cake |
|---|---|---|
| Texture | Soft, spongey | Gooey, fudgy center with crisp top |
| Flavor | Mild chocolate | Deep, rich chocolate layers |
| Ingredients | Just Oreos and milk | Cake mix, Oreos, condensed milk, butter, Cool Whip |
| Baking Method | Microwave or short bake | Full oven bake (35–40 mins) |
| Serving Style | Slice or scoop | Always scooped warm, best served with toppings |
If you’re short on time and ingredients, the 2-ingredient version can scratch the itch. But if you want something decadent, retro, and truly share-worthy, the dump cake wins every time.
Still, it’s fun to play around. You can even turn your leftover Oreos into the 2-ingredient version and serve it alongside the dump cake for a full Oreo-themed dessert night.
Creative Twists and Party-Ready Versions
Once you’ve mastered the classic Oreo dump cake, it’s easy to dress it up for different occasions. Try these fun variations:
- Add-ins: Sprinkle peanut butter chips, mini marshmallows, or crushed pretzels on top for added texture.
- Drizzle after baking: Warm caramel or hot fudge sauce adds a new layer of richness.
- Use flavored Oreos: Mint, red velvet, or birthday cake Oreos change the flavor profile without extra work.
- Make it mini: Use ramekins or a muffin tin to create individual portions perfect for parties or bake sales.
- Ice cream sandwich: Scoop chilled leftovers between cookies or brownies for the ultimate dessert mash-up.
For a retro dessert tray that really turns heads, pair slices of Oreo dump cake with classics like Black Forest Cake or Homemade Twinkies. Add in Homemade Oreos for good measure, and you’ve got a dessert table straight out of a 1980s potluck dream.
This recipe also fits right in on the Gemmir Kitchen homepage, where comfort desserts and crowd-pleasers always take center stage.
Frequently Asked Questions About Oreo Dump Cake
What is the biggest mistake to avoid when making a dump cake?
The biggest mistake is stirring the layers. A dump cake works by layering ingredients in a specific order Oreos, sweetened condensed milk, whipped topping, dry cake mix, and sliced butter. Stirring disrupts how these ingredients bake together. If you mix them, you’ll end up with an uneven texture, no gooey center, and a dense, undercooked top. Just dump, layer, and bake.
Does Oreo dump cake need to be refrigerated?
Yes, once cooled, Oreo dump cake should be refrigerated. Because it contains whipped topping and condensed milk, it’s best stored covered in the fridge. It will keep for up to 4 days. Reheat individual portions in the microwave for about 20–30 seconds to bring back that warm, gooey goodness.
How to make a 2 ingredient Oreo cake?
To make a 2-ingredient Oreo cake, simply crush 24 Oreos and mix with 1 cup of milk until a thick batter forms. Pour into a greased microwave-safe dish and microwave on high for 6–8 minutes, or bake at 350°F for about 20 minutes. It’s soft, quick, and fun but not as rich or textured as a full Oreo dump cake.
What is needed for a dump cake?
Most dump cakes follow a basic formula:
A base layer (fruit, cookies, or something creamy like pudding or condensed milk)
A dry cake mix (sprinkled on top, not stirred)
Butter slices or melted butter (to moisten the cake mix)
Oreo Dump Cake uses cookies, whipped topping, and sweetened condensed milk for the base then chocolate cake mix and butter for that classic top crust.
Conclusion
If you’re after a dessert that’s quick, crowd-pleasing, and full of nostalgic charm, this Oreo Dump Cake is just the thing. With no mixing bowls, five easy ingredients, and a gooey chocolate payoff, it’s everything comfort food should be. Whether you’re serving it warm with ice cream on a chilly night or setting it out alongside Homemade Cosmic Brownies at a family gathering, this cake always disappears fast.
At Gemmir Kitchen, we believe dessert should be simple, satisfying, and shareable and this one checks every box. Want more retro desserts, weeknight casseroles, or behind-the-scenes recipe testing? Follow me on Facebook to join our cozy little food-loving community.

