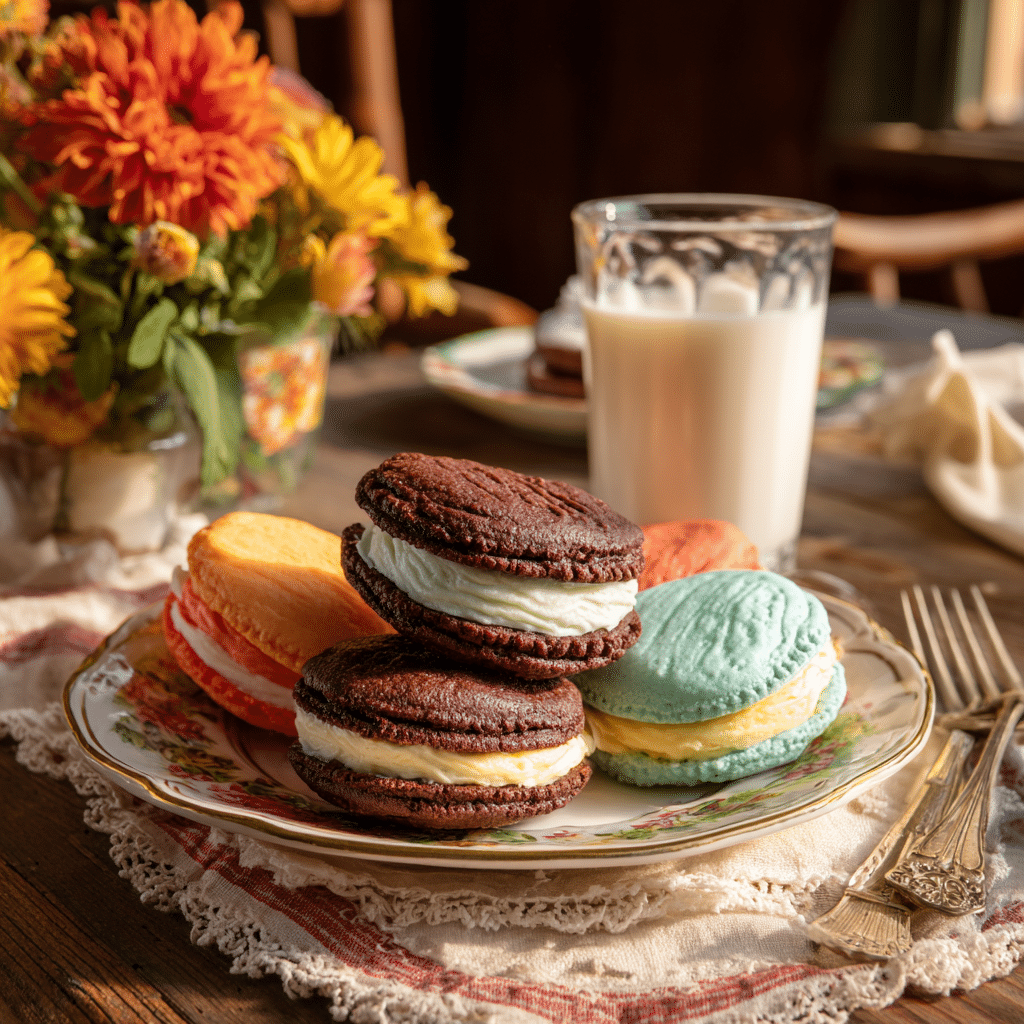
Homemade Oreos (Gourmet Oreos) are my answer to the store-bought classic that just doesn’t taste quite the same anymore. Biting into a crisp chocolate cookie with sweet, flavored cream filling takes me straight back to my mom’s kitchen in Louisville. I was probably nine, sitting on the back step with my feet swinging, a cold glass of milk in one hand and an Oreo in the other. Now, I bake these nostalgic favorites at home with rich black cocoa and bright buttercreams flavored with vanilla bean, lemon, raspberry, orange, and mint chip. They’re Homemade Oreos (Gourmet Oreos), yes but they’re gourmet Oreos, too.
In today’s post, we’ll walk through how to make your own Homemade Oreos (Gourmet Oreos) with crisp, cocoa-rich cookies and buttercream fillings that are better than anything from a box. I’ll share the tricks to perfect texture, my go-to buttercream base, and ways to make your cookies pop with fun flavor ideas. Whether you’re baking these for a birthday, potluck, or just a Saturday with the grandkids, these gourmet Oreos are guaranteed to make smiles.
You’ll also find out what makes an Oreo crisp, the secret behind that dreamy filling, and why black cocoa powder is the baker’s not-so-secret weapon. Just like I did with my Homemade Twinkies and Cosmic Brownies, this recipe keeps the comfort but adds a fresh-from-your-kitchen twist.
Print
Homemade Oreos (Gourmet Oreos): Better Than Store-Bought, Every Time
- Total Time: 2 hours 10 minutes
- Yield: 24 Oreo cookies
Description
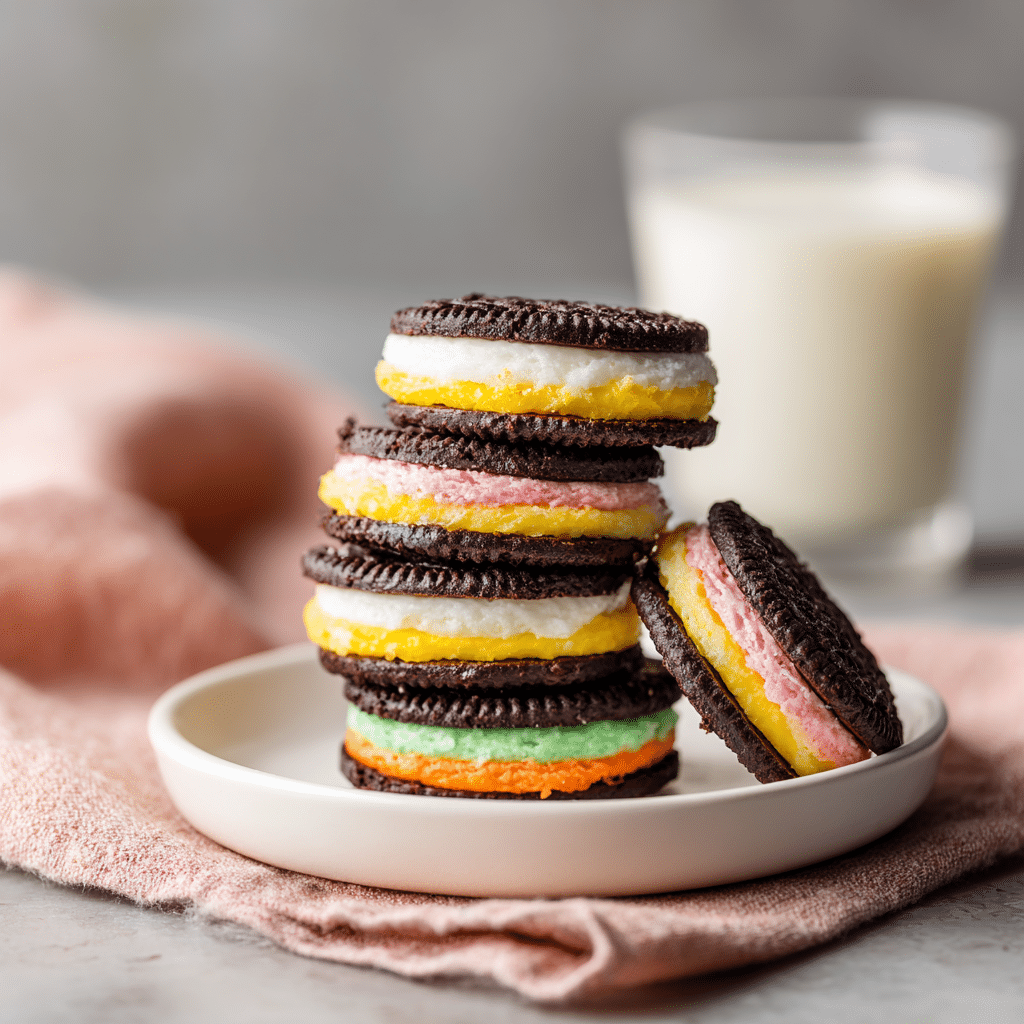
These Homemade Oreos (Gourmet Oreos) are gourmet-style sandwich cookies with deeply chocolatey black cocoa cookies and five colorful buttercream fillings: vanilla bean, lemon, orange, raspberry, and mint chip. They’re crisp, sweet, and packed with nostalgic flavor. Perfect for gifting, parties, or just reliving your favorite childhood snack—this time made with real ingredients.
Ingredients
For the Oreo Cookies:
7.8 oz all-purpose flour (1¾ cups)
1.5 oz black cocoa powder (½ cup)
¼ tsp salt
7 oz granulated sugar (1 cup)
6 oz unsalted butter (¾ cup), at room temperature
1 large egg
For the Buttercream:
8 oz unsalted butter (1 cup), at room temperature
16 oz powdered sugar (4 cups)
¼ tsp salt
Assorted gel food coloring (yellow, orange, pink, green)
½ tsp lemon extract
½ tsp orange extract
½ tsp mint extract
½ tsp vanilla bean paste (or 1 tsp vanilla extract)
½ tsp raspberry extract
½ tsp citric acid (optional)
.75 oz semi-sweet chocolate, finely chopped
Instructions
1. Sift together flour, cocoa, and salt in a medium bowl.
2. Cream butter and sugar in a mixer until light. Add egg and mix well.
3. Gradually add dry ingredients on low speed. Finish mixing by hand until smooth.
4. Roll dough between parchment to less than ¼-inch thick. Chill for at least 30 minutes.
5. Preheat oven to 350°F. Line baking sheets with parchment.
6. Cut 2″ rounds from chilled dough. Stamp with cookie stamp if desired.
7. Bake 9 minutes until puffed and dull in center. Cool on pan for 5 minutes, then transfer to wire rack.
8. Re-roll scraps and repeat until dough is used (about 48 cookies total).
9. Make buttercream by beating butter, sugar, and salt until fluffy but firm.
10. Divide into 5 bowls and flavor: vanilla bean, lemon, orange, raspberry, mint chip.
11. Spread 1 tbsp filling on one cookie, top with another. Repeat with all cookies.
Notes
Use black cocoa powder for authentic flavor and color.
Chill dough for clean cuts and less spread.
Avoid overmixing buttercream to keep it firm for sandwiching.
Try other flavors like almond or coconut extracts.
Freezes well assembled or unassembled.
- Prep Time: 2 hours
- Cook Time: 10 minutes
- Category: Old-Fashioned Cookies & Bars
- Method: Baking
- Cuisine: American
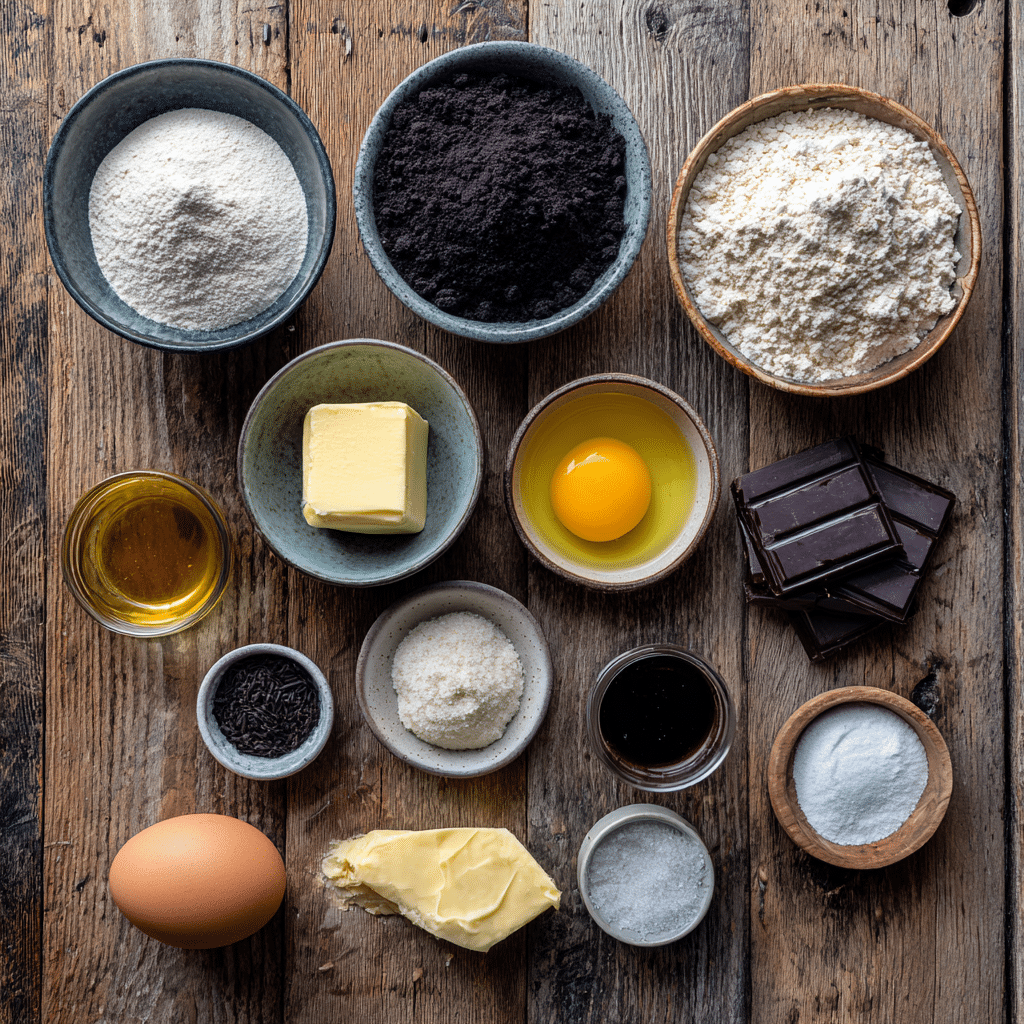
Table of Contents
Table of Contents
The Heart Behind Homemade Oreos (Gourmet Oreos)
Why I Ditched the Box for the Mixing Bowl
There’s just something about making cookies from scratch. With Homemade Oreos (Gourmet Oreos), it’s more than just replacing the packaged kind it’s about control, flavor, and joy. You get to skip the mystery ingredients and build layers of flavor using real butter, black cocoa, and extracts that smell like childhood. Plus, those vibrant fillings? That’s all you. Change them up for holidays or birthdays, or keep it classic vanilla bean for everyday goodness.
I first made these cookies when my neighbor Joyce came over with her granddaughter. We baked the cookies together, coloring the fillings while the girls giggled about which color would win. That moment stuck with me. Food connects us and these cookies are conversation starters.
Why These Are Called “Gourmet” Oreos
Gourmet isn’t about making things fancy. It’s about putting care into something familiar. These Homemade Oreos (Gourmet Oreos) are gourmet because they’re thoughtfully flavored and texturally balanced. The cookies are crisp but not dry, thanks to black cocoa and just the right amount of butter. The buttercream is firm enough to stay put but soft enough to melt in your mouth. And each filling is a flavor pop from tart lemon to refreshing mint chip.
Black cocoa gives the cookies that true Oreo look and taste. It’s what transforms a regular chocolate cookie into a grown-up treat. The fillings, made with real extracts and bright food coloring, feel fun and nostalgic, like Watergate Cake or Black Forest Cake desserts that feel both retro and timeless.
These are the kind of cookies that don’t last long in the jar.
Crafting the Perfect Chocolate Cookie for Homemade Oreos (Gourmet Oreos)
Black Cocoa Is the Secret Weapon
If you’ve ever wondered why store-bought Oreos have that near-black color and rich flavor, here’s the answer: black cocoa powder. It’s been heavily dutched, meaning the acidity has been neutralized, resulting in a smooth, almost bittersweet taste. In this Homemade Oreos (Gourmet Oreos) recipe, black cocoa does the heavy lifting in terms of both flavor and color.
I like to sift my black cocoa with all-purpose flour and a pinch of salt to keep the dough smooth and lump-free. The dough is soft, but after a chill, it’s just firm enough to roll, cut, and even stamp if you want that classic cookie look.
What makes this recipe even more fun is that it’s simple enough for everyday baking, but also detailed enough to impress. That’s exactly the balance I go for in everything I share at Gemmir Kitchen, especially in nostalgic recipes like Homemade Snacks.
Chill, Roll, Stamp, and Bake
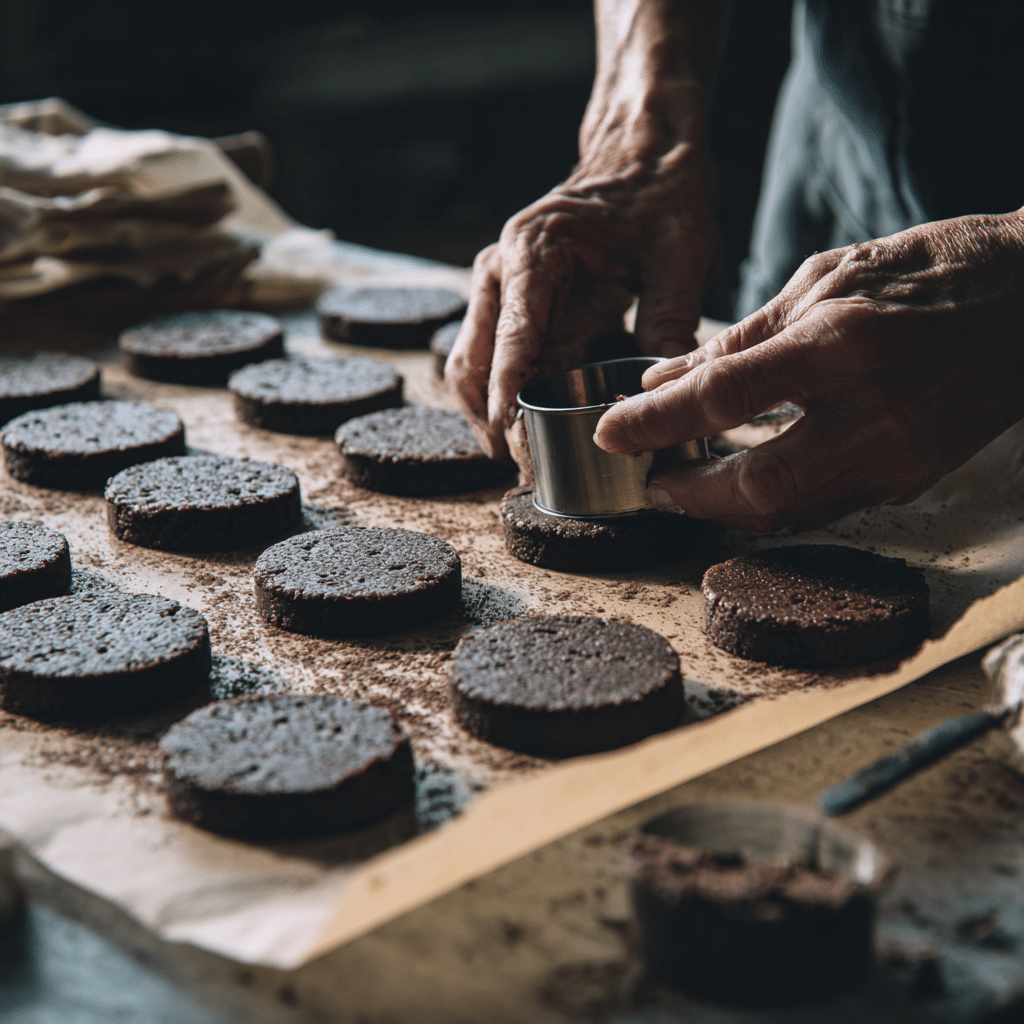
Once the dough is mixed, don’t skip the chilling step. Refrigerating it for at least 30 minutes makes it easier to handle and helps the cookies keep their shape in the oven. I like to roll the dough between parchment sheets to avoid sticking and ensure an even thickness just under ¼ inch is perfect.
For cutting, a simple 2-inch round cutter works well. If you’ve got a cookie stamp, press it in gently before baking. Pro tip: dust it with a little cocoa powder if it sticks.
Bake at 350°F for about 9 minutes. You’ll know they’re done when the shine on the center disappears and they’ve puffed slightly. Don’t overbake; these cookies will firm up as they cool.
After cooling for five minutes on the pan, transfer them to a rack and let them cool completely before frosting. Trust me it’s worth the wait.
And don’t toss those scraps! Re-roll them (chill again if needed), and you’ll get close to 48 cookies total enough for 24 filled gourmet Oreos.
Flavor-Packed Fillings That Make These Gourmet Oreos Pop
One Buttercream Base, Five Classic Flavors
The buttercream starts with a simple base: real butter, powdered sugar, and a touch of salt. The trick? Mix just until fluffy but still sturdy this isn’t cupcake frosting. You want it smooth and spreadable but firm enough to stay between two cookies without squeezing out the sides.
From there, divide the frosting into five portions and let your imagination (or pantry) lead. These are the five flavors I go back to again and again:
- Vanilla Bean – Made with vanilla bean paste for tiny flecks and deep flavor. You can substitute vanilla extract if needed, but the paste makes it feel a little more special.
- Lemon – Brightened with lemon extract and citric acid for a zingy tartness, plus a drop or two of yellow gel coloring.
- Orange – Same citrus zip as lemon, but with a mellow orange twist. I love the retro creamsicle vibes this one gives off.
- Raspberry – Pretty in pink and bursting with berry flavor, this one looks as fun as it tastes.
- Mint Chip – Green-tinted with a splash of mint extract and finely chopped chocolate. This one’s a favorite around holidays and summer parties alike.
Want more nostalgia-inspired ideas? My Old-School Treats section is full of recipes like Homemade Cosmic Brownies that blend childhood memories with grown-up flavor.
Colorful, Custom, and Kid-Friendly
These fillings aren’t just for looks. Each one offers a bold flavor that plays perfectly with the cocoa-rich cookies. Whether you’re planning these for a birthday, cookie box, or just a weekend project, this is the part where you can let the kids help or play around with new flavors.
To assemble, spread a generous tablespoon of filling on one cookie, then sandwich with a second cookie and press gently until the buttercream spreads to the edges. If you’re storing them, keep them in an airtight container. They’ll stay fresh at room temperature for 4–5 days or even longer in the fridge.
Want a party platter idea? Arrange these by color, and you’ve got a rainbow of Homemade Oreos (Gourmet Oreos) no one will believe are from scratch.
Storing, Customizing, and FAQs About Homemade Oreos (Gourmet Oreos)
How to Store and Freeze Your Gourmet Oreos
These Homemade Oreos (Gourmet Oreos) aren’t just made to impress they’re built to last (if you can keep from eating them all in one go). Here’s how to keep them fresh:
- Room Temperature: Store assembled cookies in an airtight container for up to 5 days.
- Refrigerator: For longer freshness, refrigerate for up to 2 weeks. Let them come to room temp before serving for best texture.
- Freezing: You can freeze the unassembled cookies and buttercream separately. Just thaw and fill when ready.
Tip: These freeze especially well when wrapped individually in parchment and stored in a zip-top freezer bag. Makes for a fun lunchbox surprise or emergency sweet tooth saver.
Planning to make these ahead for a party? Assemble them the night before and store them in the fridge. They’ll be even better the next day, with the flavors melded and the cookie perfectly crisp.
Fun Variations and Serving Ideas
You can swap flavors, colors, and even cookie shapes depending on the season. Try:
- Holiday themes: Red and green mint chip for Christmas; pink raspberry hearts for Valentine’s.
- Monochrome: Stick to vanilla bean and keep the buttercream white for a classic look.
- Sprinkles: Roll the cookie edges in sprinkles for birthday flair.
Serve them on a vintage platter beside a pitcher of cold milk, or add them to your cookie boxes next to Homemade Twinkies for that full nostalgic vibe. You can find even more treat pairings in the Desserts category of Gemmir Kitchen.
What’s the secret to a perfectly crisp Oreo?
Black cocoa powder, chilling the dough, and rolling to just under ¼ inch. Bake until the shine in the middle disappears don’t overdo it or they’ll turn dry instead of crisp.
What is the secret ingredient in Oreo filling?
It’s the combination of vanilla bean paste and salted butter that creates that iconic cream flavor. Citric acid (optional) adds a candy-like tartness for fruit flavors.
What is the best filling for Homemade Oreos (Gourmet Oreos)?
Vanilla bean is the classic, but mint chip and raspberry are fan favorites. The beauty of homemade is choosing your own “best.”
What does the O in Oreo stand for?
This one’s fun: no one knows for sure! Some say it’s derived from the French word or (meaning “gold”), used in early packaging. Others think it’s just a catchy syllable. Either way, it stuck.
Conclusion
These Homemade Oreos (Gourmet Oreos) might just ruin you for the packaged kind and that’s a good thing. With crisp cocoa cookies and buttercream fillings that are fresh, vibrant, and totally customizable, they bring comfort and fun to any table. Just like the recipes I grew up with, they’re simple enough to make with family but special enough to share with friends.
From my Kentucky kitchen to yours happy baking!
Got questions or want to show off your cookies? Come chat with me on Facebook: Gemmir Kitchen Facebook Page
